Clay Studio

Clay Studio

Construction is finished!

The construction of the kiln is finished!  The arch is up and looks beautiful!  Notice how tightly the door closes against the wall of the kiln.  It really took some shaving of brick - a very vital step to having a tight seal for a safe, efficient firing.
The burner system is real simple.  We used a pair of "Big Bertha" burners, black pipe, and a couple of gauges.  Tom swears by these burners.  Says they burn more efficient than any burners he's ever used - and he should know!
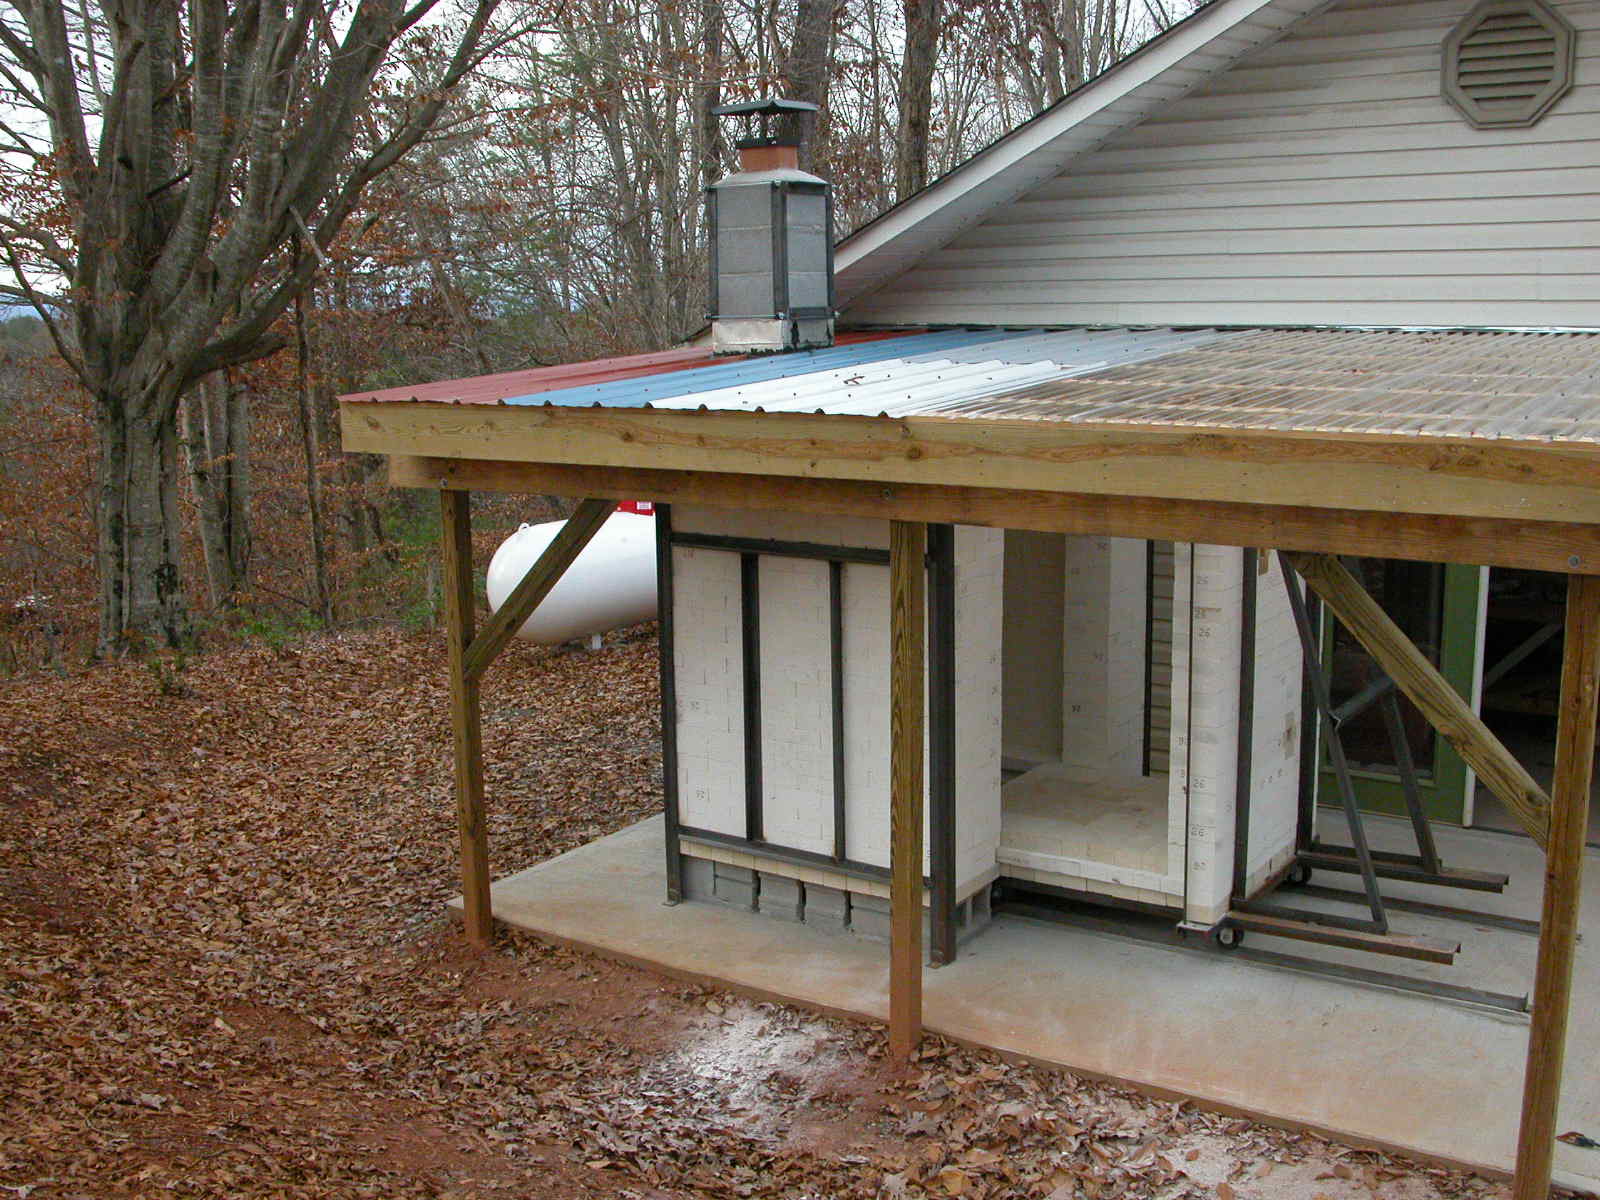
The last thing that needs to be done is to have the propane company come and hook up a pipe line from the propane tank to the union, with a 10 lb. regulator.  I''ll be setting up an appointment to have that done this week.


Right now, I"m making a bunch of smaller pieces to fill the kiln for the first firing.  Hopefully, I'll then feel confident enough to fire the lion dogs in the next firing.  Stay tuned!

Building the arch

Now that the roof is up, we can build the arch of the kiln.  Tom had saved the beautiful arch form he built out of wood, a number of years ago when he built this kiln before.


First, we supported the arch form on top of 2 x 4's, then placed the bricks on top of the form, and worked from the outsides toward the center.  The final, center row was the trickiest, as it needed to be a tight fit to be sure the bricks would maintain the arch shape once the form was dropped and pulled out.


We then covered the top of the arch bricks with a thin layer of kaolin and sand, for extra seal.  Next, the arch will come out.

Chimney is finished and roof is on!


The chimney is finished and the roof is attached.  Having different colored roofing wasn't my first choice, but it was all that was left, and I wanted to get the roof finished sooner than later.  The part of the chimney above the roof was made from chimney flue and block, mortared together.  The bottom block, closest to the roofing was flashed to prevent leaking around the chimney.  Angle iron was welded around the corners for added protection.  It sure is great to have a roof over our heads, and not have to deal with covering the entire project with large pieces of plastic.

Building The Chimney

The chimney has to be completed in order for the roof over the kiln can be finished.  It will be a relief to have the roof done, as we've had to protect the kiln with pieces of plastic and tarp.


Notice the hard brick laid on the interior of the chimney stack.  That's to give a solid base for the chimney flue to sit on.

Tom is cutting flashing to fit around the block so that when the roof is placed, the flashing can be attacked to the steel roof to prevent any water from coming through.

The top of the last chimney block is mortared shut.

Attaching Angle Iron


Tom cuts and welds an angle iron frame to envelope the entire kiln.  The door of the kiln is also secured from the top with angle iron and a steel rod.  This will keep it in place at all times.

Building Up The Walls, Phase 2


The walls of the kiln are stacked along with the chimney.  We cut a clay shelf to span across the bricks where the damper will sit.

View of Lower Walls


We've built up the kiln walls, thus far.  You can see how the floor of the kiln fits flush when it is pushed all the way in.


Here's a view of the chimney going up with the back wall.  Every 4-5 rows, we tied the chimney in, by continuing the brick over into the wall, for added support.


Here's the back view of the kiln, with chimney.

Lower Layers of Walls


Note the detail work necessary to get a good fit on lower part of kiln.  We'll start to build the lower walls of kiln, then switch over to completing the door.  A hole was drilled in the steel to screw and bolt in a vertical steel rod that will run alongside the door in order to secure it in place, once it is up.


Once the first layers of brick have been layed, we pushed the car out of the kiln to start building up the lower walls.  Using insulating soft brick is quick to stack - no mortar!  Note where there are darker bricks above the burner ports.  Those are hard brick used for extra support.  You can also see where the angle iron tracks end inside the kiln.

Building Up The Walls


Now it's time to start building up the walls around the floor, while taking the chimney up at the same time.  While stacking the first rows of wall bricks, we had to continuously push the floor in and out to make sure it was a tight fit, and at the same time slide in and out, easily.  The walls are stacked with 2 layers of K26 insulating soft brick, and the chimney is built with K23's.  The chimney, or course does not get as hot as the kiln itself, so using K23's was a more affordable option.

Awaiting funding to continue

This is about as far as we've gotten!  I am now doing a fundraising campaign on www.indiegogo.com  Here is the link to my campaign:
http://igg.me/p/46295?a=278466&i=shlk

Any amount donated for this kiln project will be received with tremendous gratitude.
Another way you can help is to pass this word on to everyone you know!

Many thanks!
Tacy

Setting concrete blocks


We set the (8" x8"x 16") concrete blocks in mortar.  They go around 3 sides, with the chimney at the back.  The walls of the kiln will be built on top of these.  We were careful to level each block, and allow a brick width of space between the top of each block, and the middle layer of soft brick, to create the lower ledge for the car to slide along.  The accuracy of this is vital to building a straight, tightly sealed kiln.

Floor of kiln


The 3rd, and final layer of brick is set on the soft brick, leaving a 2' ledge around the periphery.  This allows for the door to slide into the kiln, closing tightly.  Shelves and pots will be placed directly on top of this layer of hard brick.  We are now ready to set the concrete blocks with mortar.

Laying brick floor


After the steel car is built and set on tracks, it's time to lay the floor.  First, we put down a piece of Durock, then a layer of hard brick.  On top of that, a layer of soft, insulation brick was placed so that it tapered inward toward the front of the floor.  This allows for the car to slide in and out of the kiln, easily.  In order to do this, the middle bricks needed to be cut to size.  Note the slight angles of each of the center bricks in order for everything to fit snug.

Car on Wheels

Now the car sits even on top of the angle iron on the concrete slabs we poured.  Next step is to start laying the floor of the kiln with 3 layers of brick.  First layer is hard brick, then insulated soft brick (k-26), then hard brick.
www.tacyapostolik.com

Building forms for extended tracks


We ran into a glitch with the concrete slab.  It’s imperative that the tracks lay level in order for the pots to stack evenly and the car to slide into the kiln, straight.  Therefore, we had to build 2 forms to pour some heavy duty vinyl concrete on top of the original slab in order to level out the tracks.  Once they set, we'll lay the angle iron on top, then the steel car.
www.tacyapostolik.com

Attaching wheels

Wheels are attached.  They are what's called v-groove wheels.  Real heavy duty.  They will sit on top of the angle iron and roll real smoothly along the tracks.  Now we need to mount them on the tracks for rolling in and out of kiln.
www.tacyapostolik.com

Starting the project

This week I started building a propane, car kiln at my studio in Weaverville, NC, just 10 minutes north of Asheville.  The design was created by a friend of mine, Tom Turner.  www.tomturnerporcelain.com Tom is an established, talented ceramics artist, and he has generously agreed to build this kiln with me.  I chose to build a car kiln because I am creating these very large guard dogs (komainu) and would not be able to load them into any other type of kiln.
Thanks to the generous support of a friend, Steve Ferrari, I am able to begin phase 1 of the kiln project.

First thing to build is the steel car.  Tom welded the angle iron to the side pieces of channel iron.  Next, the v-groove wheels will be attached, and then we lay the car level on the ground to prepare for mounting on tracks.
www.tacyapostolik.com